Soil improvement
Soil improvement or soil conditioning is perhaps the most important job to consider when planning a new garden. There is little point in spending a considerable sum of money on an exotic plant to then scratch a hole in a poor garden soil and hope that the plant will flourish.
Although improving the soil is hard labour there are many rewards if you are prepared to invest a little time and sweat in your garden soil.
- The most obvious is that your plants will grow better. Digging plenty of organic matter into the soil encourages all sorts of beneficial sub-terranean life who then convert all this organic matter into a form useful to plants.
- The more stuff you dig into the soil the darker the soil becomes. Dark soils warm faster in the spring.
- Drainage and aeration is improved. Most plants do not like to sit in wet soils and roots like to have access to air.
- Increases water retention - rather like a sponge.
- Personal fitness. It is surprising how quickly your fitness improves when digging over a whole garden. (Unless of course you are a heavy smoker, then the whole experience just becomes a nightmare.)
- The biggest benefit of thorough soil preparation though is that in subsequent years the soil becomes so easy to work. When it comes to dig up plants for winter protection or division it is so much nicer to deal with a loose crumbly soil that can easily be shaken or washed off the plants roots. Replanting the borders in spring too is effortless compared with an unconditioned soil.
Soil conditioners
Basically any composted plant based material can be used for soil improvement. In the past (during times of abundance) even pilchards and sprats were ploughed into the fields. Un-composted material such as saw dust or wood shavings are not recommended as they require nitrogen for decomposition and this will rob the plants of their needs.
Any or all of these products make excellent soil conditioners regardless of soil type (i.e. clay or sandy):
- Ground and composted bark. This is a low cost, high bulk product.
- Home made compost. Free and nutritious
- Composted manure.
- Old compost from failed experiments, grow bags etc. although this does run the risk of attracting foxes.
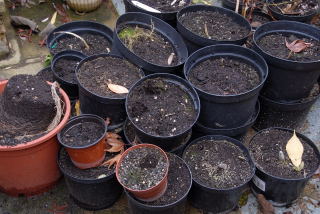 Flower pots such as these can be emptied and the old compost used to help improve the soil. This saves you
having to taking it down to the dump or emptying it behind the shed. First the old roots need to be removed from the compost.
 - Take the pots to where you require them.
- Empty the first pot. If is still has any remains of a stem, hold the compost by this old stem and bang it against the back of a garden fork. The soil should fall away to the ground and the old stem and roots can be chopped up and added to the compost heap.
- Carry on until you finish.
- Peat - for environmental reasons.
- Things derived from dead animals - anything with the words hoof, horn, blood, fish or bone should be avoided. This is not because they are bad for the soil but if you live in an area with foxes your garden will be constantly dug up by foxes searching for the carcasses of dead animals.
- Multi-purpose composts - peat free or otherwise as these also contain animal derivatives which will attract foxes.
- Grit or grit sand is sometimes recommended for really heavy clay soil improvement but lime-free grit is pretty expensive and has a very poor coverage for the price.
- Soft sand and play pit sand should never be added to clay soils as this only makes matters worse. In fact small children who have never known other wise will be perfectly happy in a sand pit with grit sand and you can allow them to fling it all over the place. Then when they grow up, what's left is there for you to use in the garden.
Preparing your soil - Double digging
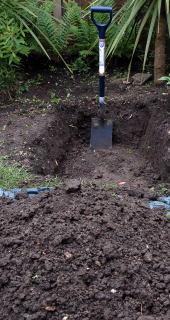 The process of garden soil improvement is generally referred to as double digging. Traditionally this referred to an
elaborate system of the digging and back filling of trenches, no doubt involving complicated mathematics.
The important thing is not to set the goal of digging over the whole garden on the first weekend. You may soon become disillusioned and give up. Choose an area of about 1-2 m² to work on at a time.
The following pictures describe the process for conditioning a clay soil. The process is the same for sandy soils but less arduous.
- First lay a tarpaulin next to the section of soil you wish to improve.
- Dig out one spade's depth of soil and pile it on the tarpaulin.
- Break up the clumps of soil as you go along.
- It is important not to mix the top soil with the sub soil.
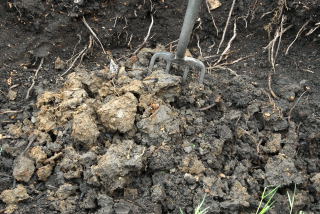
Next...
- Break up and turn over the sub soil with a garden fork.
- When you have dug over the entire hole add your composted material.
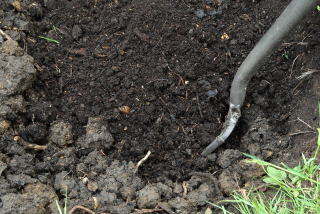
- in this instance home made compost is added to the disturbed sub soil but any of the soil conditioners mentioned above will do. This is an excellent use for home made compost as any weed seeds in the compost will fail to germinate and not become a nuisance at these depths.
- How much conditioner to use? You can never really use too much. The worse the soil the more you should use. This is not a job you wish to do again and again so use as much as your budget will allow.
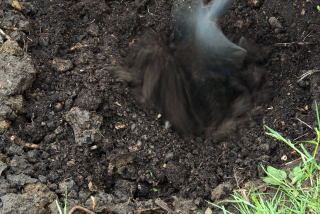
- Using a spade chop and twist into the clumps of clay.
- As each clump is divided it becomes coated with compost. (A bit like mixing butter and flower for making pastry).
- The more you chop the smaller the lumps become.
- Add more compost as you go along if you feel that more is needed to coat the clumps.
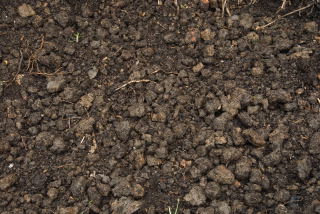
- Eventually the soil should look something like this. Lots of small lumps of clay coated in compost.
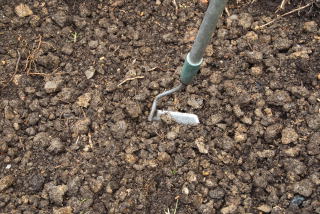
- To fine tune your soil improvement efforts, slice repeatedly through the soil using a hoe. This chops up the lumps of clay even further and is less back breaking than using a shovel.
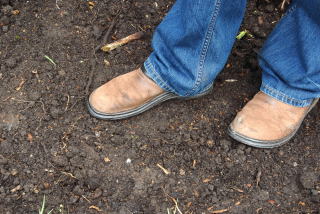
- Gently tramp the soil. The soil will have fluffed up quite considerably and have too many large air gaps. If the soil is too loose the plants will not get sufficient grip and be more inclined to topple over. Also if you do not do this you will never get all the rest of the soil back in the hole.
- The remaining top soil can now be returned to hole. Add a layer of soil then a layer of soil conditioner. Give the soil a mix with a garden fork then and a gentle tramp. Take care not to mix the sub soil with the top soil.
- Continue this process until all the soil is back where it started.
The process of soil improvement was carried out twice (over the period of two winters) on the two main borders of the garden featured on this website. In subsequent years only the individual planting holes were enriched. As a result the soil level in the borders is now several inches higher than the lawn.
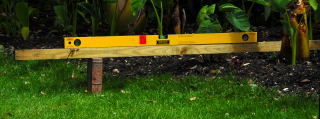
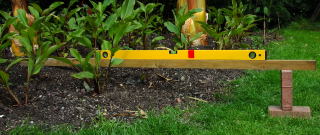
This process took place over approximately 10 years including the two years mentioned above. The initial double digging enrichment primarily involved ground and composted bark plus a smaller amount of composted farm manure.. Annual plantings generally consume about 6 X 60litre bags of composted farm manure and the entire contents of the compost heap.
Soil improvement around established plants
Soil improvement around established plants is achieved by spreading composted manure or any weed free compost around the base of plants in the autumn. This is a slower process but it relies on the soil borne organisms to draw down nutrients into the soil. This method encourages worms who dislike repeatedly dug over soil. These worms in turn do the hard work of soil improvement on your behalf.

