Germinating seeds

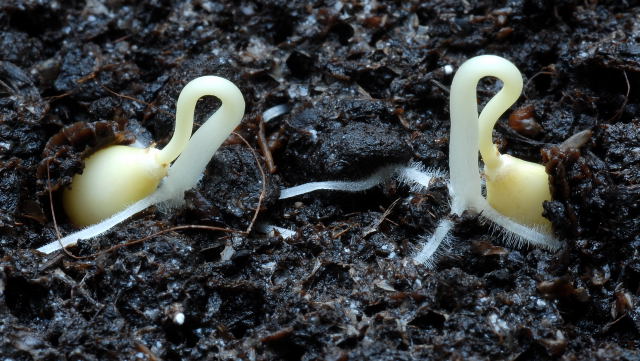
Newly germinated papaya seeds
Germinating seeds is a very satisfying process. Apart from the self gratification angle, there are a number of other advantages to growing your own tropical plants from seed.
- Cost - seeds are invariably cheaper than buying an existing plant (Although this does not factor-in the occasional disaster).
- Free seeds - In many cases, after your initial purchase, your plants will provide you a life time of free seeds, which translates to free plants.
- Freedom of choice - growing plants from seed increases the range of plants available to you.
- Quantity
Possibly the greatest advantage of growing your own plants from seed is that it removes the suffocating bond that develops between you and an expensive plant. If you fork out lots of money for a plant and it turns out to be rubbish, the inclination is to persevere, wasting valuable real estate in the garden. On the other hand, cheap seed-raised plants that perform badly, can be tossed on to the compost heap with hardly a second thought.
For the cool-climate tropical garden, the types of seeds to be germinated fall into two camps.
- Annual seeds. This includes any tender perennials that are grown as annuals i.e. plants that are discarded at the end of one season.
- Longer term projects. This is defined as anything that needs more than one season to really impress.
Equipment needed
- Flower pots or seed trays.
- Fresh sterile multi-purpose compost.
- Clear plastic freezer bags.
Flower pots/seed trays
Generally speaking, germinating seeds in clean plastic flower pots (3-4") produces the best results. Seed trays can be used with larger amounts of seed, but it is best to use them only with seeds that germinate within a short period of each other. The ideal conditions for germination are not necessarily the ideal conditions for a newly germinated plant. For example: When a seed requires dark conditions to germinate. As soon as the first seed germinates it will need bright conditions but those bright conditions may inhibit further germination of the other seeds. Left too long in the dark and any germinated seeds will become etiolated.
Also it is important to get air circulating around your newly germinated seedlings to prevent damping off or other forms of rot. However, once you remove the pot from its controlled environment (sealed freezer bag) the compost will naturally begin to dry out . This in turn will create less than ideal conditions for any remaining un-germinated seeds.

How not to grow seeds
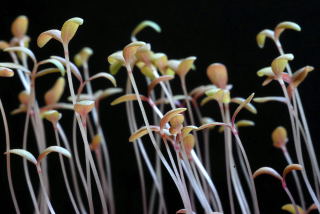
Here, there are far too many seeds in the pot and have been grown in poor light conditions. This will make it extremely hard to prick out the seedlings. Once they begin to develop any top growth the seedlings will become top heavy and fall over. In circumstances such as these it is better to throw them away and start again
.
Sterilised compost
Sterilized multi-purpose compost helps to prevent diseases such as damping off. This is where a fungus attacks the new shoots at soil level and kills the new seedlings. There are copper based fungicides designed to prevent damping off. These fungicides require mixing and always seem to produce about 100 times more than you need at the time.
A simpler solution is to sterilise the compost prior to planting. Also allow fresh air to circulate around the seedlings as soon as possible after germination. Not crowding the seeds in the pot also helps to prevent damping off.
Methods suggested for sterilising the compost are:
- The microwave oven
- The conventional oven
- Sterilisation using boiling water
Using the microwave, compost is placed within a freezer bag and nuked for a certain period. This results in a bag of compost that is too hot to handle for several hours and makes the kitchen stink.
Using the conventional oven, compost is placed in an oven-tray and heated to a certain temperature. This results in a tray full of compost that is too hot to handle for several hours and an equally smelly kitchen.
Using boiling water is the simplest option. Clean flower pots are pre-filled with fresh multi-purpose compost. Boiling water is then poured over the top. One advantage of this method is that you don't have to second guess how much compost to sterilise for your current project. Another is that by the time the pots have cooled they will have drained perfectly and will not require further watering once the seeds are added.

Soaking seeds
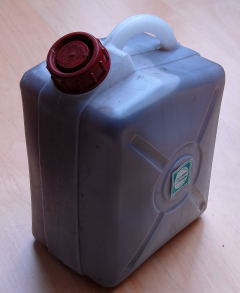
Many seeds benefit from a good soak before being planted. Having gone to the trouble of sterilising the compost, it wont do your seeds any harm being soaked in cooled boiled water. As it is impractical to try and plant all your next seasons seeds in one go, fill a container such as this with boiling water. Seaweed extract is claimed to enhance germination rates so you can add some to the container (follow manufactures instructions). Allow it to cool. This will provide you with a reservoir of sterile water with which to soak your seeds, as and when you need it.
Place your seeds in a small glass or other container and cover with the liquid. Do this just before you sterilise the compost. Then by the time the compost has cooled, the seeds will have had a good soak and will be ready to plant. Avoid soaking very small seed as they become awkward to work with.
The remainder of the liquid can be used to water your newly germinated seeds.
Clear plastic freezer bags
Once you have planted your seeds, the flower pots are placed within a clear plastic freezer bag and sealed. This prevents the compost from drying out and removes the need for you to water them. Most seeds will germinate at room temperature. Seeds that require warmer temperatures can be kept warm in an airing cupboard i.e. near the hot water tank or placed in a heated propagator.
Where to start germinating seeds?
The best results are generally achieved by starting seeds indoors. Once the seeds have germinated they are moved out into the greenhouse. If you don't have a greenhouse, plants can be grown on a window sill (internal) provided it does not receive direct sunlight. So North, East and West facing windows are ideal(Northern hemisphere). One problem with window sill culture is the imbalance of light and heat. The warmth of the house will encourage the plants to grow faster than the light available. This can lead to tall but weedy growth.
Another draw back of window sill culture is the plants need to be acclimatised to real light. Plants grown on a window sill and placed straight out into the garden in full sun may get their leaves scorched. They will need to acclimatise in a shady part of the garden for a week or so to get used to the strength natural light. Plants grown in the greenhouse do not suffer in this way.
Over enthusiasm can also be detrimental to your plants success. If you start all your seeds indoors too early you could run into a number of problems:
- Light levels will be too low leading to weaker plants.
- You may run out of window space as the plants grow.
Moving plants to the greenhouse in January will simply give you a new set of problems. Light levels will be better but it will be colder. Young tropical plants do not enjoy sitting in cold wet compost. They will not grow much and be more susceptible to pests and disease. The same plants sown a month or even 6 weeks later will soon catch up and overtake plants germinated in January.
When to start seeds?
This of course depends on the species of plant you are trying to grow. This table gives a rough guide when to begin starting seeds.
Fluorescent grow lights
For the purposes of the temperate-climate, tropical gardener, fluorescent grow lights do not really make that much of a difference. All of the plants seen in the pictures on this website have been grown without the use of any grow lights.
Pre-greenhouse days saw some experimenting with fluorescent grow lights. In terms of quality and growth rate, plants grown in natural light conditions won every time.
Using grow lights, produced plants with almost zero tolerance for natural sunlight. Plants that were not slowly acclimatised to natural light, tended to get fried the first time the sun came out, (what a waste of time that was). It is a bit like getting a fake tan then going somewhere hot and expecting not to get burnt. You can't beat the real thing, as the saying goes.
The plants featured on this site will either grow to their desired height in one season or require more than one year. Sticking the seedlings under a set of grow lights will not make a significant difference.
.

